This program is suitable for all ages and levels of training and is highly addictive! Learn how to build in all the buttons your horse needs to reach their full potential. Mobilise the shoulders with ‘leg extensions’, engage the hind with ‘piaffe’, and combine movements to produce cadence and enhance your horse’s performance.
In-Hand
with Jack
Follow each season, building in all the ‘buttons’ your horse needs to reach their full potential.
Complete all 4 seasons to take your training to the next level!
Complete all 4 seasons to take your training to the next level!
Spring
Summer
Autumn
Winter
Spring Season
Relaxation starts in the jaw, so this is where our journey begins. In this season you will learn how to release tension in the jaw, relax back muscles, and how to achieve true engagement.
Download our quick reference cards for each lesson to keep you and your horse on track!
Spring: Lesson 1
Jaw Release
- Suppleness
- Contact
- Relaxing jaw
- Relaxation
- Tension
- Cadence
- Rhythm
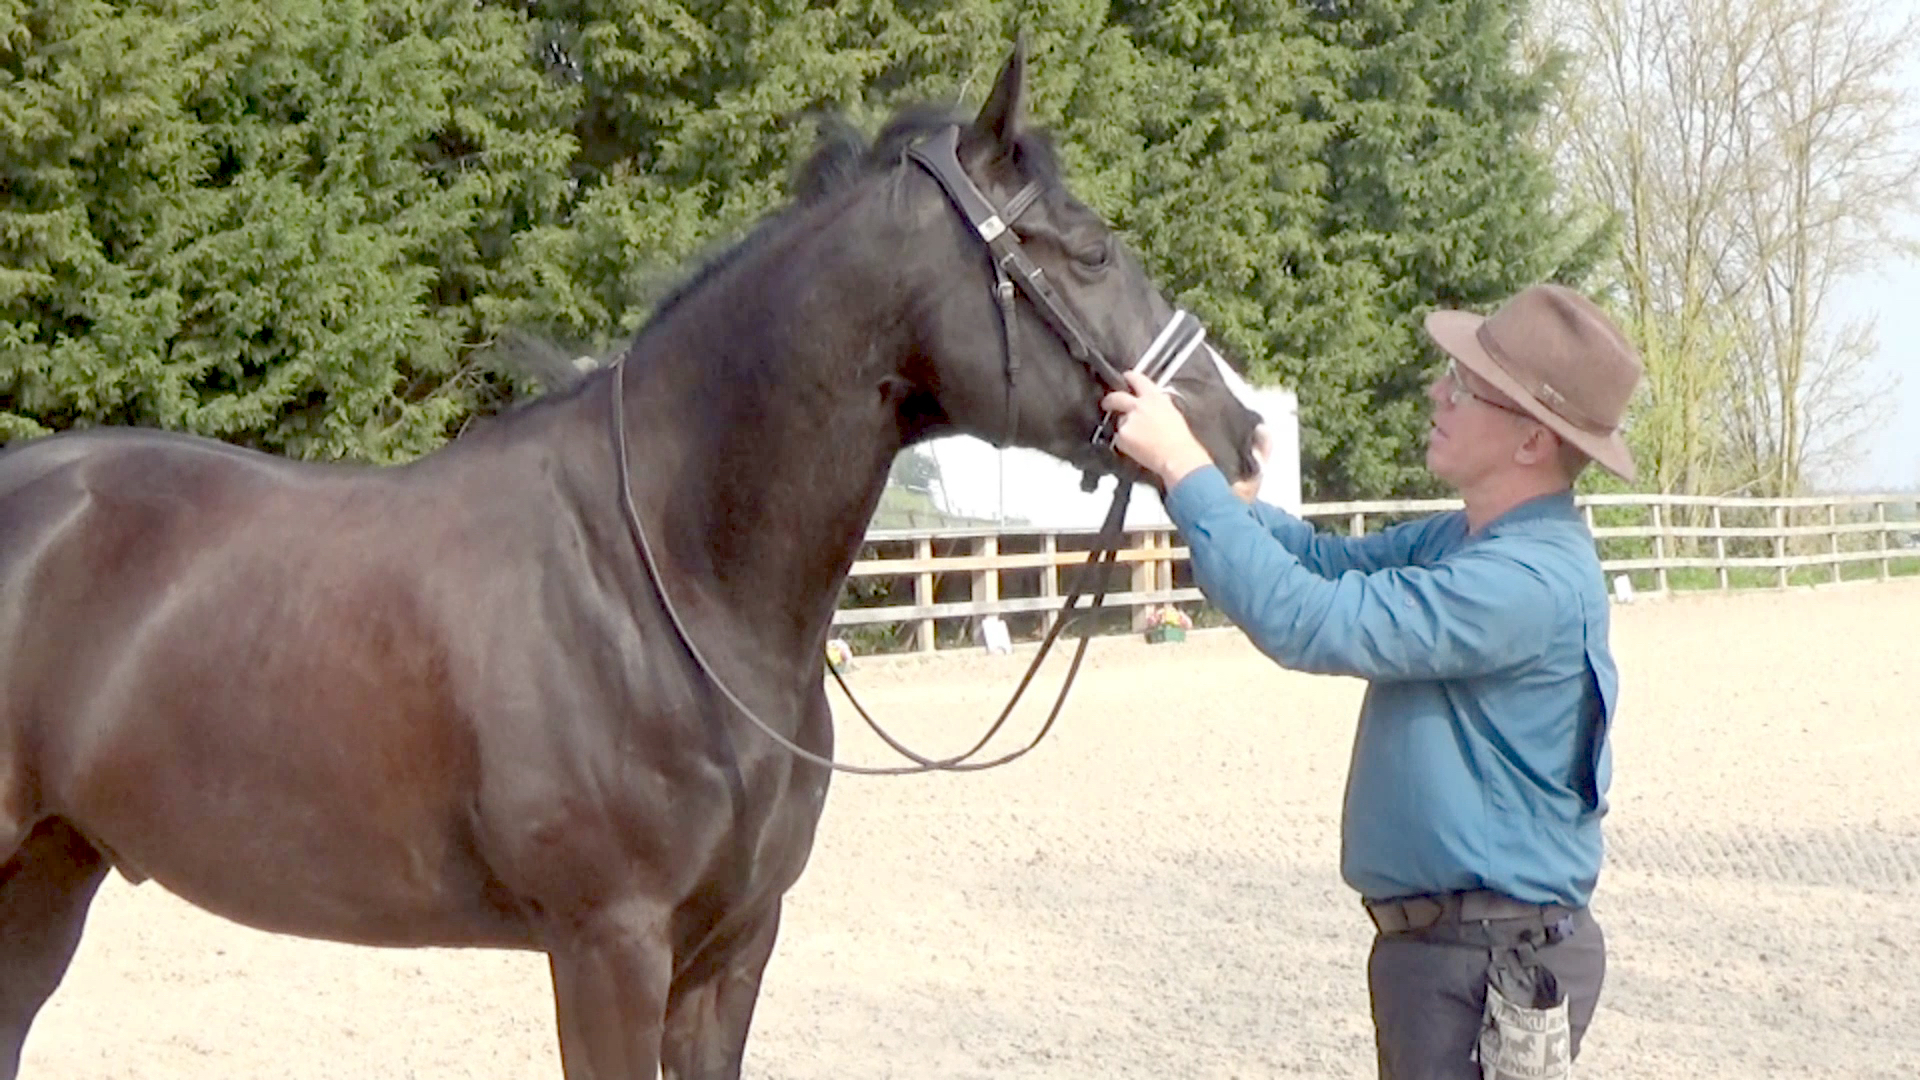
Learn how to 'release the jaw' to improve the contact and connection.
Jack is the joker of the herd and manages to make everybody laugh with his antics. He didn’t get off to a great start in life - Tracy actually rescued him as a three-year-old. He’s now a strapping nine-year-old and doing well at higher-level dressage. Because he is short-coupled, he can be a bit stiff through his back. Teaching him to release his jaw and stretch the bit down is just what he needs to improve suppleness.
The Old Masters used to say that the horse should “chew the bit down to the ground”. In this lesson, Jenku demonstrates how to release your horse’s jaw in hand so that he understands what you are asking when you’re on his back and take up rein contact. By relaxing his jaw, Jack is able to lick, chew and swallow. This sets off complex neurological changes which allow him to relax. Relaxation and suppleness go hand in hand. A tense horse will be unable to concentrate, lose cadence and rhythm and be uncomfortable to ride.
Spring: Lesson 2
Relaxation
- Relaxation
- Tight back
- Long and low
- Engagement
- Swing
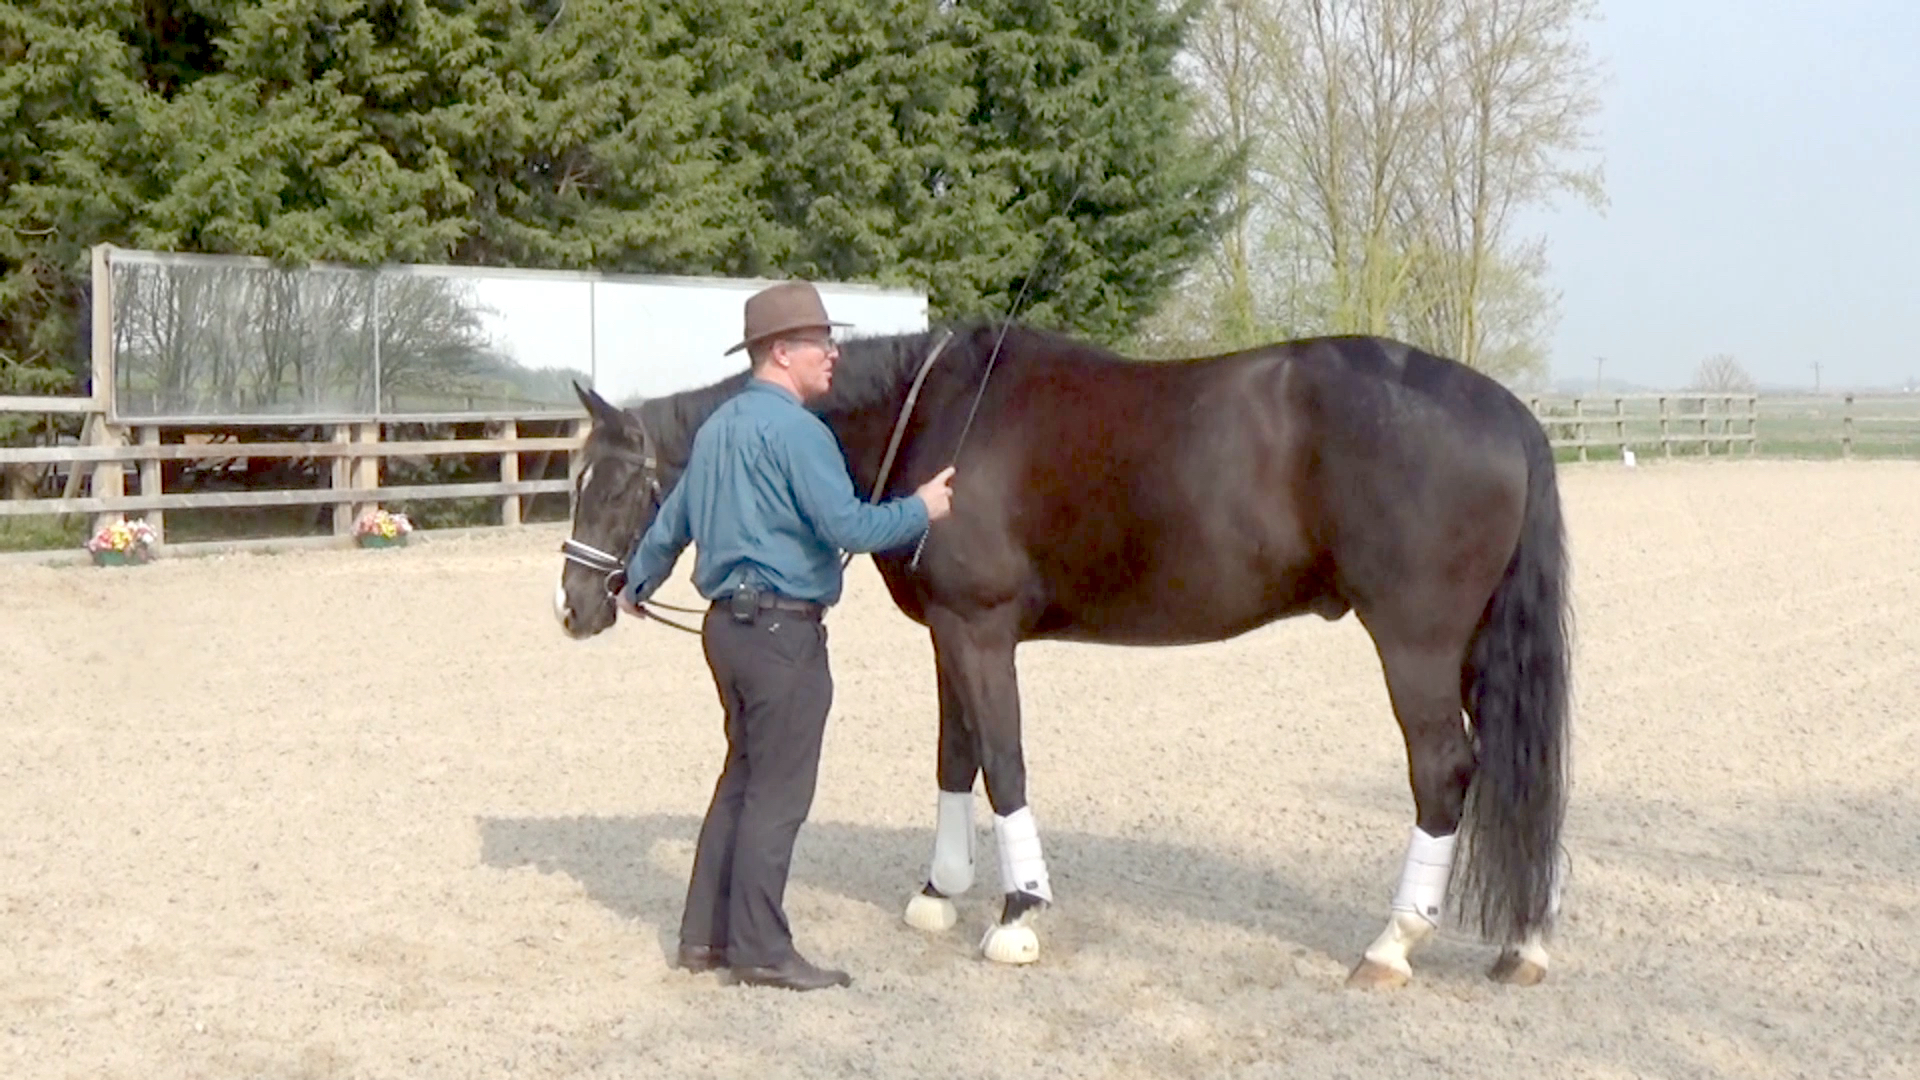
Learn to release the back muscles so your horse can truly engage the hind.
Relaxation is where all good things start and end. In this film, Jenku teaches Jack that relaxation is the cornerstone for everything he does. Because horses are flight animals, their nervous systems are hard-wired for alertness and action. This often results in a raised head and tight back, neither of which are great when Tracy is schooling. Cooling the nervous and training a long and low frame allows the horse to relax over his back, which means he can use his stomach muscles to pull his hind legs forward and under.
This is the essence of dressage – true engagement and relaxation. By stroking the horse firmly with the piaffe whip over his back, you can teach him to un-contract his back muscles and stretch forward and down. Just like people, horses can’t learn when they’re anxious or stressed. Anything they learn when they’re relaxed will stay in their long-term memory. This is an invitation to go for a holiday in your head - while teaching your horse to do the same. Lucky Jack.

Spring: Lesson 3
Shoulder-In Facing
- Shoulder-in
- Engagement
- Connection
- Neck
- Balance
- Suppleness
Learn exactly where you need to place the inside hind leg in 'Shoulder-In'.
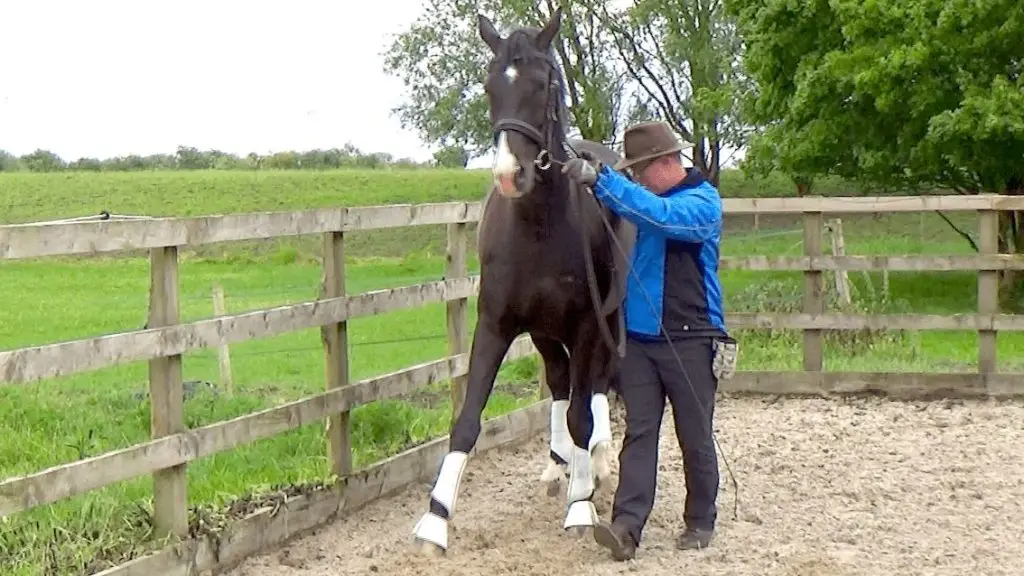
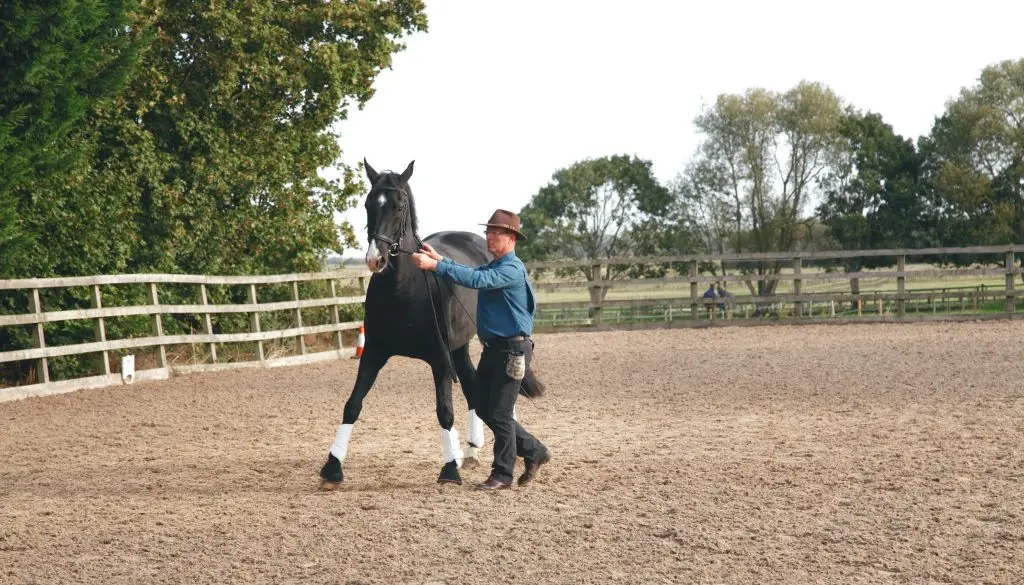
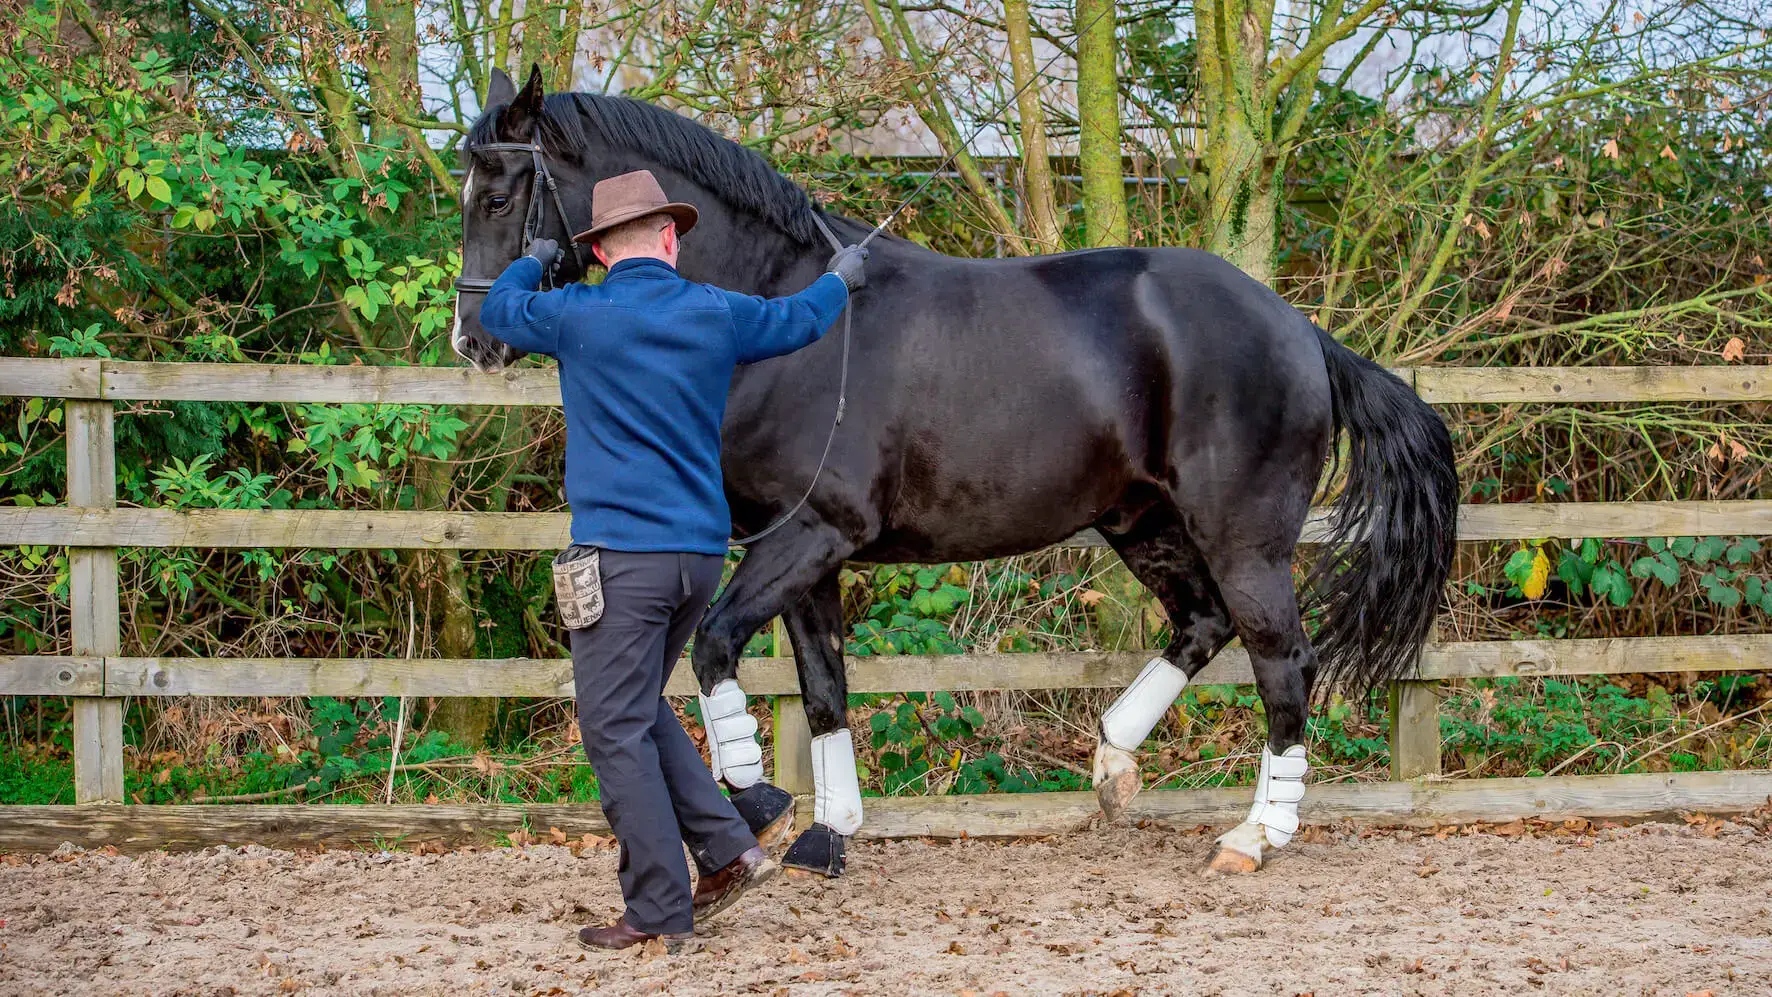
'Shoulder-In' is a dressage exercise which people often find difficult to master. In this lesson, Jenku helps Jack get the feel of stepping his inside hind leg forward and under while in hand. Training in hand shoulder in is a matter of precise timing and relaxation. Jenku demonstrates how to hold the snaffle bit and bridle with a straight arm which acts as an extension of the horse’s spine. Walking backwards slowly, you tap the whip at the girth where your heel would be. Here’s the tricky part – you need to tap just as your horse’s inside hind hoof hits the ground, otherwise you run the risk of raising stress levels in your horse.
Muscles work in pairs and one set of muscles needs to relax to enable the alternate pair to work effectively. A relaxed and uncontracted back allows the stomach muscles to do their job properly and pull the hind legs forward and under the horse. Training complex movements in hand is a great way to set your horse up for success before you get into the saddle. In the next lesson, Jack ups his game and progresses from Shoulder-In to Renvers on a circle!
Spring: Lesson 4
Archer’s Stance
- Shoulder-in
- Renvers
- Engagement
- Swing
- Connection
- Neck
- Balance
- Counter curve
Stand like an 'archer' and transition from 'Shoulder-In' to 'Renvers'.
'Shoulder-In' to 'Renvers' on a circle might sound really complicated, but if you have a good set up in 'Shoulder-In' and really get your horse’s inside hind leg forward and under, the moment you go into counter curve you’ll see a lovely swing in the hind legs. And this is really what it’s all about. In this lesson Jenku works with Jack on the next step in developing your horses lateral work in hand. Starting with an 'Archer’s Stance' in Shoulder-In, when you feel your giving you a nice connection, 'tsk' and reward.
The next step is helping your horse shape his neck because, when the neck is lifted, the balance shifts to the hind quarter. From a good Shoulder-In, pull down lightly on the whip hand as the inside hind leg touches the ground and ask for the slightest counter curve. Reward the 'smallest try' and then go again. Be careful not to keep the pressure on for too long, as this can make your horse claustrophobic and his behaviour and movement will deteriorate instead of improving.
Downloadable Quick-Reference Cards
Spring: Lesson 1 Jaw Release

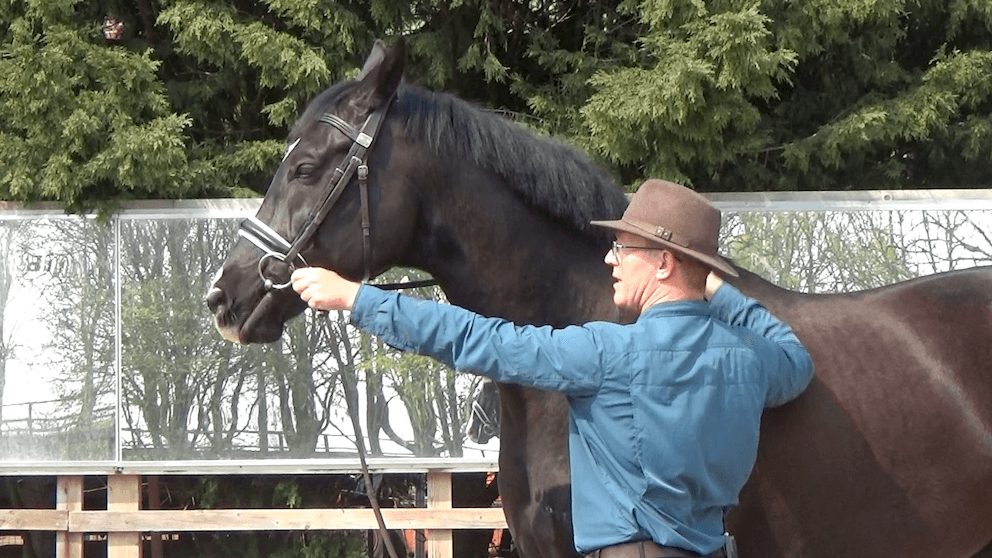
Before you start, loosen your horse’s noseband. Make sure you can easily fit 2 fingers underneath otherwise your horse cannot release the jaw.

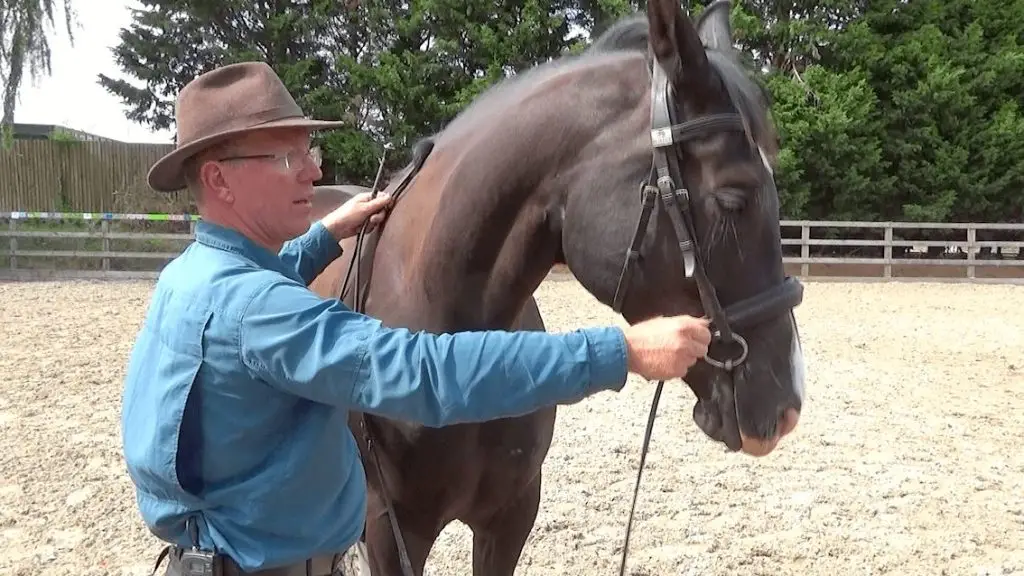
Hold the cheek pieces like a ‘syringe’ with your thumb through the bit rings and gently raise the bit upwards into your horse’s mouth corners.

Keep a consistent steady ‘contact’ with the bit raised until your horse ‘releases’ the jaw and starts to chew the bit - ‘tsk’ & reward.

Next guide your horses nose forward and down towards your belt buckle whilst still holding the bit rings evenly on either side - ‘tsk’ & reward.

Finally stand next to your horse’s side, take up the contact with both reins and reward your horse for taking the bit forward and down.
REMEMBER:
Keep the bit straight and raise both sides evenly. Focus on the behaviour that you want, rather than what you don’t want, and reward each small step.
Keep the bit straight and raise both sides evenly. Focus on the behaviour that you want, rather than what you don’t want, and reward each small step.
- Spring

Summer Season
Your horse’s mouth is like a 'Formula 1 steering wheel'! In this season you will learn how to build in the buttons that correspond with all the different movements you will need in dressage.
Summer: Lesson 1
Renvers
- Short coupled
- Releasing the back
- Stepping wide behind
- Renvers or counter curve on circle
- Shoulder in
- Lightness
- Inside hind leg aid
- Rewarding the smallest try
- Nagging
Learn how to loosen your horse's back so they become supple and 'light'.
Jack is short coupled and Tracy has to always work on releasing his back when she’s riding. In this lesson Jenku works with Jack in hand to show you how to loosen up your horse’s back behind the saddle by getting his hind legs to step wide behind in counter curve on the circle. It’s best to watch this after watching the 'Spring Archer’s Stance' lesson. To do 'renvers' (or counter curve) on the circle you need to start with a good 'shoulder in'.
Once your horse is light and forward, give a tiny tug with you whip hand. This pressure on the corner of your horse’s mouth swings his inside hind leg forward and under. The counter curve encourages him to step wider behind, which helps the back to release. When you’re starting out, remember to reward the smallest try. You don’t want to keep your horse going for four or five circles without rewarding his effort otherwise he’ll end up shutting down. Don’t nag your horse, either. You cluck once to encourage forward movement and follow up with a tap of your whip. You don’t want your horse to ignore you.
Summer: Lesson 2
Rein Back
- Rein back
- Lightness
- Straightness
- Swinging the quarters in
- Relaxation in the back
- Leg pressure
- Setting up for success for ridden work
- Shoulder in three tracks
Train 'rein back' on the ground so you can see what exactly is going on.
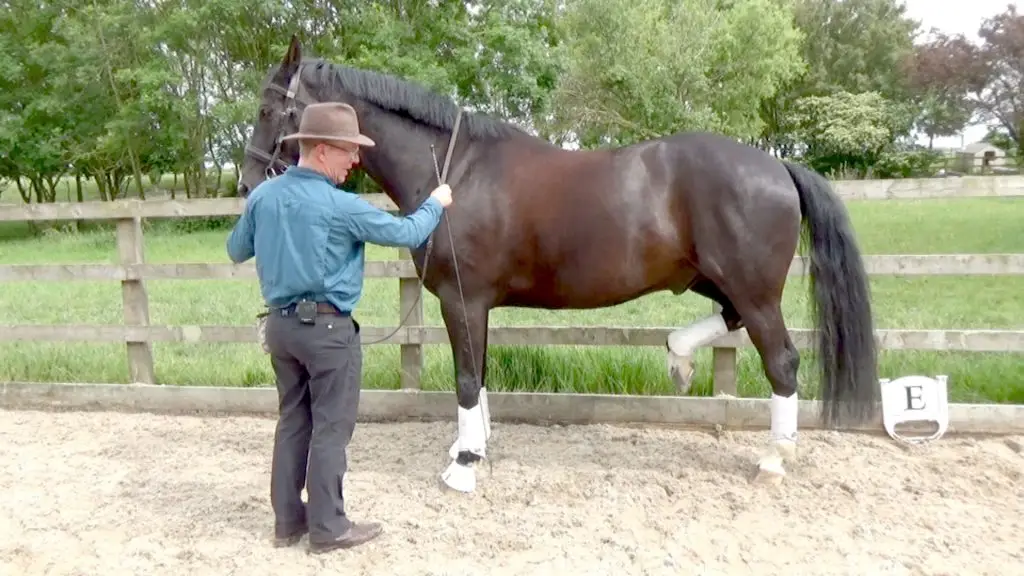
A good rein back needs to be light and straight. Horses often swing their quarters in if they are not relaxed over their backs. Riders counter this by using more leg pressure on the side that’s swinging in, but then you end up with a line that zigzags across the arena. Instead of getting into a tug of war where you pull harder on the mouth, you can train a light rein back on the ground using your whip as you can be very specific about which part of his body you want the horse to yield.
In this lesson, Jenku sets Jack up for success. They begin in a slight shoulder in position with pressure on the right mouth corner. This helps Jack keep his right hind leg from swinging off the track. Your horse can’t work his abs properly if his back is contracted so when Jack does a few good steps, Jenku takes the pressure off and rewards him. The next step is to pick up the rein. The right mouth corner controls the right hind leg. The left mouth corner controls the left hind leg. Now, in perfect sync you and your horse can take one straight step after the other – just like dancers in harmony!
Summer: Lesson 3
Hock Flexion
- Courtship behaviour
- Tension
- Building blocks for piaffe and passage
- Ignoring unwanted behaviour
- Timing precision to click and reward
- Relaxation
- Obsessive compulsive
- Neutral feet and mind
This is the first step towards piaffe - and the best bit is anyone can do it!
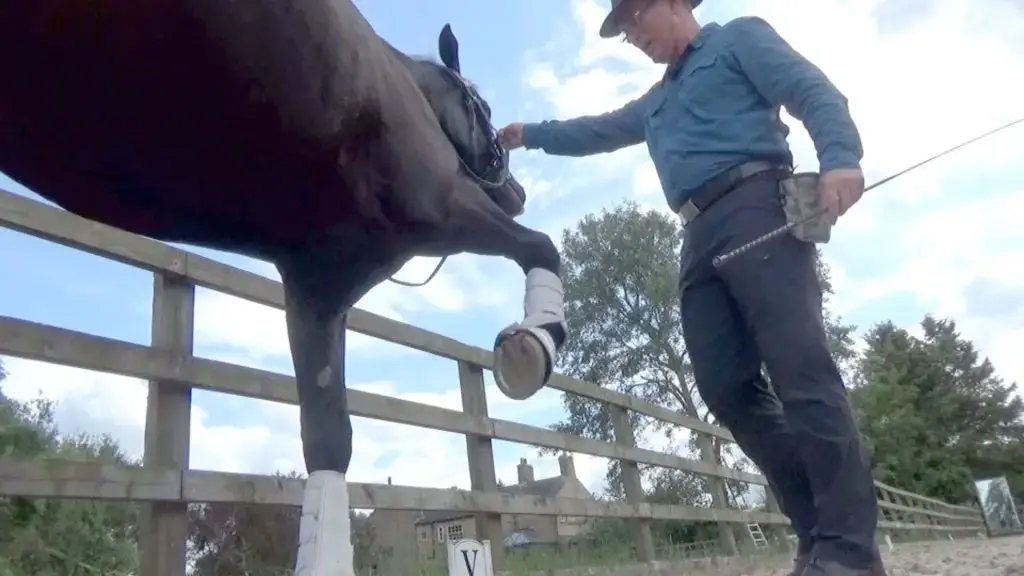
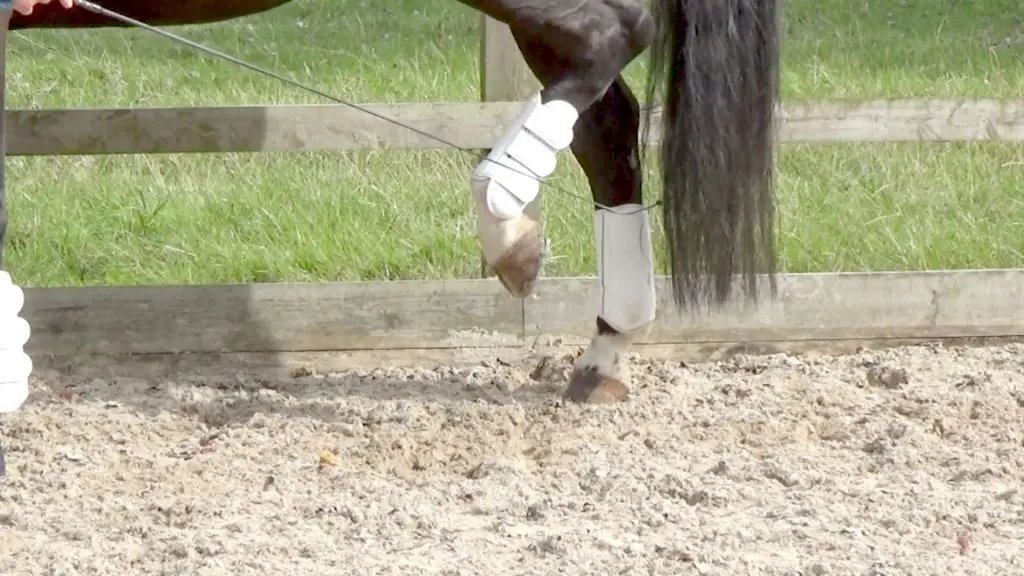
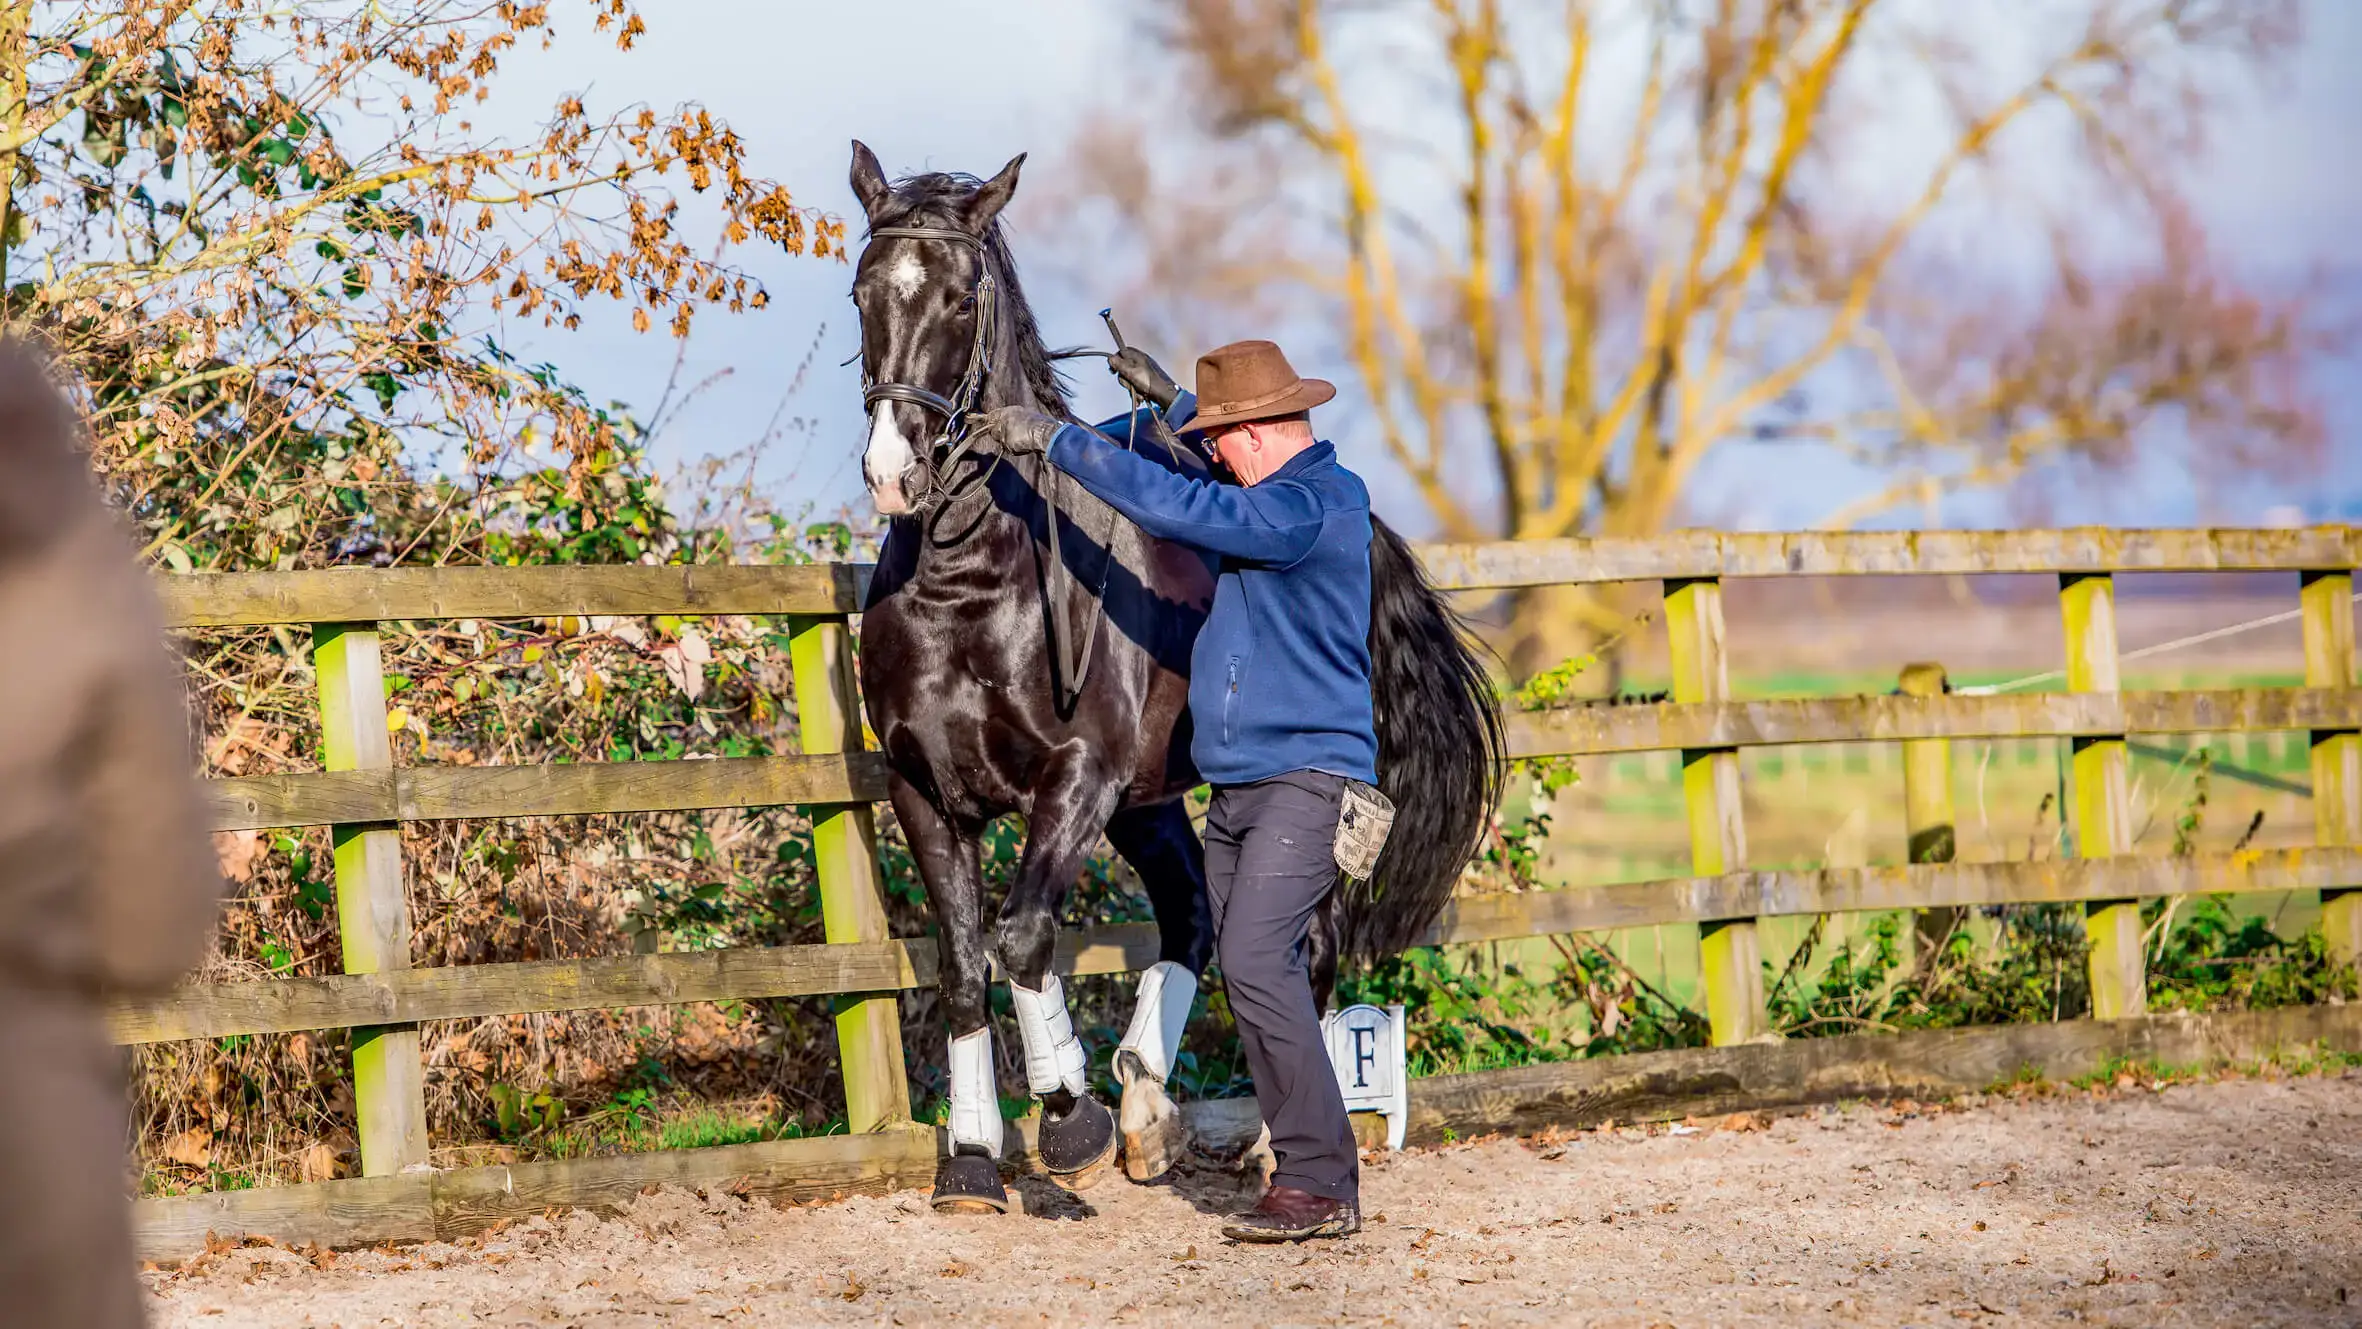
Piaffe and passage should be beautiful to watch. They are both part of a horse’s courtship behaviour and these movements shouldn’t be forced or full of tension. All you need to do is watch a stallion strut his stuff to see that these come naturally to horses. In this lesson, Jenku trains Jack to flex his hocks – the building blocks of piaffe and passage.
Jenku begins by setting Jack up against the fence, with his hand on the rein near the snaffle ring. Jenku positions himself at Jack’s shoulder and has the piaffe whip ready to point at his hind leg in the middle of the cannon bone. If you put light pressure on the rein, point at the hind leg and the horse doesn’t respond, you can tickle the cannon bone with the whip. Jack soon joins the dots and lifts his leg consistently on cue. Remember to intersperse this training with relaxation, otherwise it’s easy to train your horse to become obsessive compulsive. Remind your horse that you’ll still pay him in treats for 'neutral feet and mind'!
Summer: Lesson 4
Leg Extension
- Flashy extended trot
- Mobilizing the shoulder
- Building correct muscles
- Weight shifting
- Relaxation
Wish your horse had a flashy trot? Enhance it using 'leg extensions'.
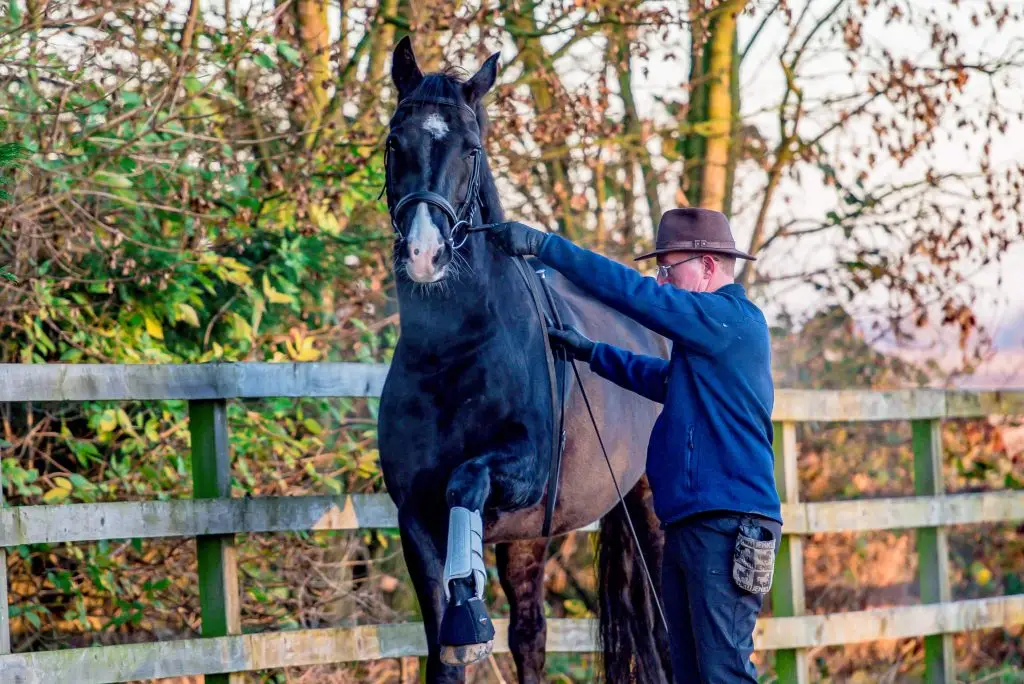
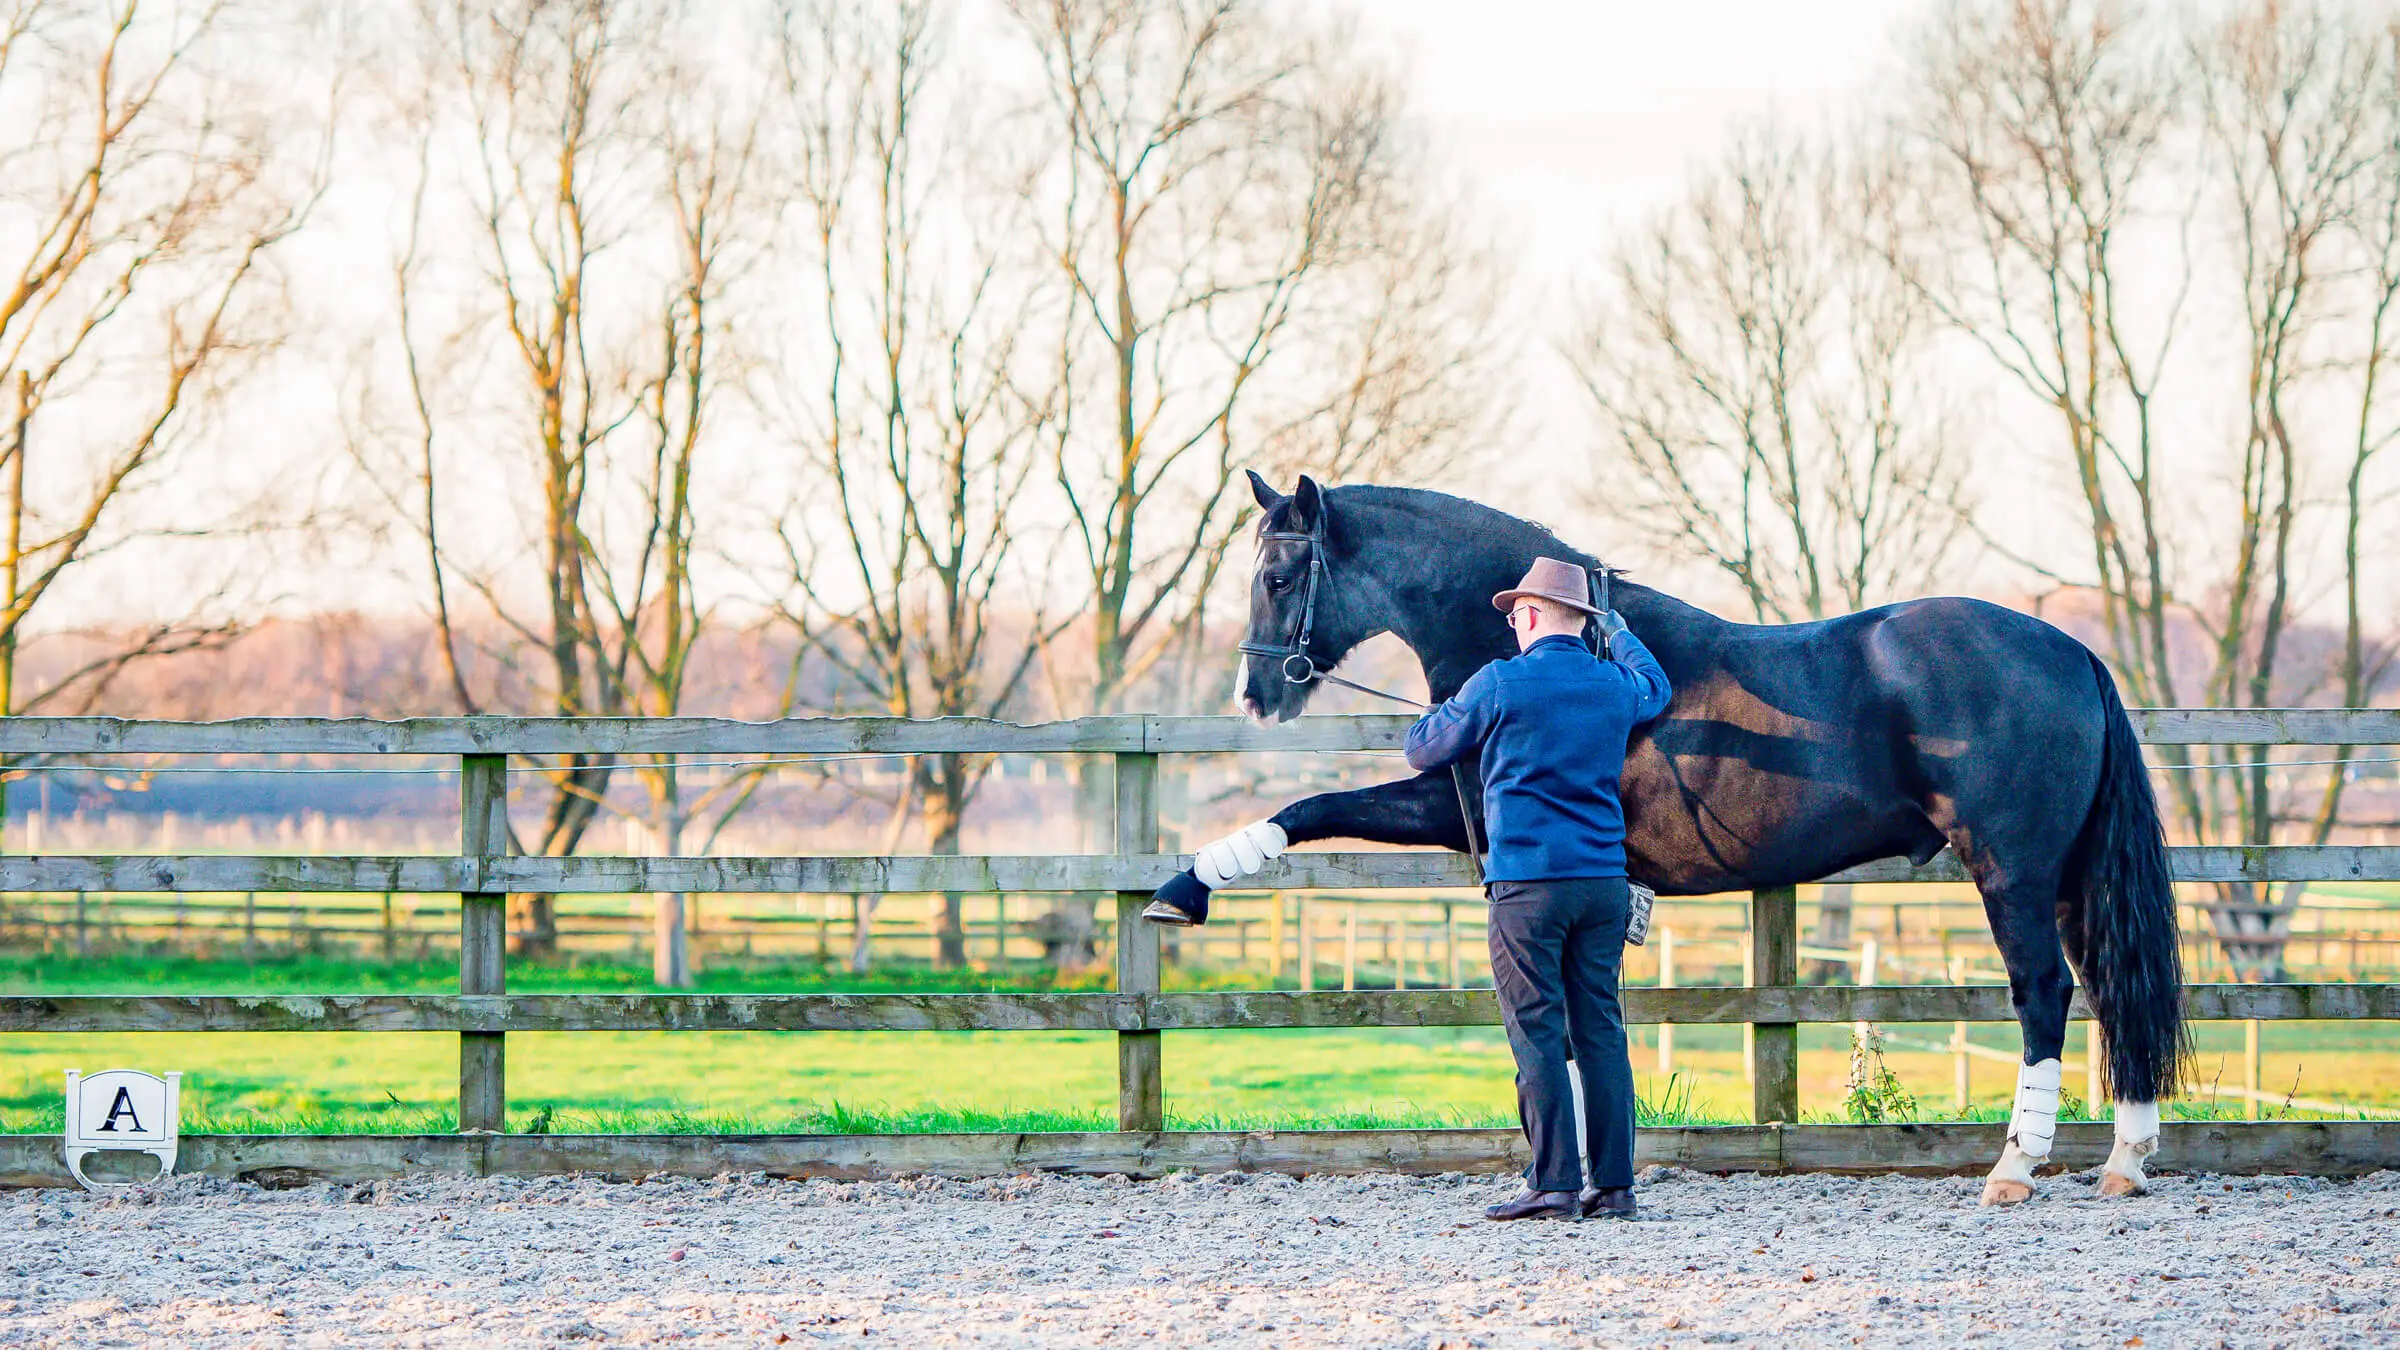
If your horse doesn’t have a flashy trot, this lesson is for you! Your horse’s mouth is like a Formula 1 steering wheel, you can build in buttons that correspond with different movements. Jenku teaches Jack that when he lifts the left mouth corner up (by pulling the rein up gently) this shifts Jack’s weight to the right and he’s able to lift his left leg. Some horses do it automatically but if your horse isn’t responding quickly, you can touch him behind the knee with your whip handle. It’s different from the hock flexion which has a similar aid because of the angle of the rein and your focus.
Initially all you want is the horse to lift his leg, but as you up the criteria, you will ask him to bring his knee up and forward so that the leg swings forward. It’s easy to see how this will help build more mobility in the shoulder. Make sure you are standing out of reach of the front leg as you don’t want to get kicked by mistake. Be sure to train in relaxation between the leg extensions so that your horse remains calm and doesn’t frantically try different moves in order to win your praise.
Downloadable Quick-Reference Cards
Summer: Lesson 1 Renvers

Start by setting up ‘shoulder in’ on a circle in ‘Archer Stance’ in walk - you may need to revisit this lesson in Spring season.

Staying in ‘shoulder in’, bring your energy up and ’cluck’ once to ask for trot. If Follow up with a tap of your whip at the girth, where your leg would be.

Once your horse feels light and forward in your hand, give a tiny tug downwards with your ‘whip hand’.

This pressure on the corner of your horse’s mouth swings his inside hind leg forward and under.

The ‘counter curve’ encourages your horse to step wider behind, which helps the back muscles to release.
REMEMBER:
Reward the ‘smallest try’. Don’t keep your horse going for multiple circles without rewarding their effort otherwise they will end up shutting down.
Reward the ‘smallest try’. Don’t keep your horse going for multiple circles without rewarding their effort otherwise they will end up shutting down.
- Summer
Autumn Season
In this season more complex movements start to take shape. You will see how the lateral work is excellent for your horse's flexibility as they will really start to loosen and swing their back.
Autumn: Lesson 1
Travers
- Travers
- Half pass
- Break movements down
- Quiet mouth
- Clear picture
- Lightness
- Soft lateral bend
- Mould
- Rewarding the correct feeling
- Training sympathetically
- Relaxation
Learn how to 'mould' your horse in Travers and progress to Half Pass.
In this lesson you’ll start by learning travers 'in-hand' along the wall. Then, when you’ve got this nice and solid, Jenku shows us how you can move away from the wall, and mix in some intricate patterns which is very exciting. This will include half pass, which is simply travers on a diagonal line. The trick is to break the movements down into smaller, learnable parts and then like a jigsaw puzzle, you can put all the parts together.
The bit, reins, your body and whip all create a ‘mould’ for your horse. When you’re training, every mould should feel the same. Every time his body takes the travers shape, you click & reward and say “Yes!”. By training sympathetically and for relaxation, it will soon be comfortable for him and he’ll assume the shape willingly. Relaxation is your number 1 criteria. Everything follows from there. Tracy is thrilled at how soft and light Jack looks and knows that when she gets on and asks him to do travers, he’ll already know just how his body should feel and it will be a job well done.
Autumn: Lesson 2
Lateral Patterns
- Shoulder in
- Renvers
- Travers
- Half pass
- Flexibility
- Relaxation
- Parasympathetic autonomic nervous system
- Engagement
- Short-coupled horse
- Stiffness
Get creative with lateral movements and go for a dance with your horse!
Jenku says, “What I love about this lesson is that you can do different manoeuvres with your horse and he will be able to feel that your form is changing and adjust accordingly. This is dancing with your horse.” In our previous lessons, Jack has already learned shoulder in, renvers and travers as separate exercises, so combining them is just a matter of stringing the separate components together.
These are not just fancy moves for the sake of it. Flexibility increases relaxation and relaxation increases flexibility so for a highly-geared horse such as Jack, doing these exercises helps him access the parasympathetic state of his autonomic nervous system. This allows the powerful V8 engine running inside him to go from full throttle to a slower idle! The intention is not to do endless circles or get fixated on your goal of crossing the whole arena in half pass. Instead, you’re looking for that lovely moment when your horse softens, and he lets you know that he’s found his best balance. Tracy is thrilled with Jack’s progress. You can really see how he loosens up as the lesson progresses.
Autumn: Lesson 3
Dynamic Hock Flexion
- Clucking like a chicken
- Clean training
- Hock flexions
- Precursor to piaffe
- Mastering complex movements
- Neutral feet and mind
- Visual cue
- Audible cue
- Focusing on the positive
Progressing towards piaffe - adding a forward step to the hock flexions.
Clucking like a chicken is never a good idea - unless you’re Miss Henny Penny! In this lesson, you will learn how successful training is all about timing and breaking a movement down into learnable parts. Because 'hock flexions' are a precursor to 'piaffe', it’s important that you master this so that you can then move on to more complex movements. Riders often think that clucking frantically will generate energy and get their horses to lift their hind legs. The reality is that this often ends up making the horses nervous as they frantically move around like a 'cat on a hot tin roof'!
Now you can develop on that and start to add forward steps to the movement. You will see that Jack is allowed to make mistakes, this is normal. If you were playing the violins, you would hit thousands of false notes, but each day you would improve. The same applies to your horse. If he makes a mistake, ignore the unwanted behaviour and focus on the positive elements that he offers you. The more you focus on the positive tries, you’ll be surprised to note how much more frequent they are.
Autumn: Lesson 4
Dynamic Leg Extension
- Language brain
- Weight shift
- Dynamic leg extensions
- Freeing up shoulder
- Extended trot
- Flying changes
- Consistent cues
- Solid basic training
Progressing towards Spanish Walk - starting to alternate the front legs.
Horses don’t have a language brain, but we are training them to do complex movements without using words. It’s mind blowing stuff! In this lesson Tracy is excited to learn more about dynamic leg extensions because this exercise is useful for enhancing so much other dressage work. Think of freeing up the shoulder for the extended trot and for flying changes in the canter.
To recap, Jenku makes sure that Jack’s 'static leg extensions', learned in the Summer season, are solid. Once consistent, you can add a forward step, so the sequence looks like this:
- extend front leg
- take a step forward
- extend other front leg
- reward
This exercise is as much about ‘training the trainer’ as it is about training the horse. If the horse is not getting it right, it means that you aren’t getting it right. That’s not to discourage you, but rather to encourage you to take it back a step, work on the basic movements until they are really established and then try again.
Downloadable Quick-Reference Cards
Autumn: Lesson 1Travers

Start on an angle next to the fence. Hold the rein near the bit ring and tap the hind leg with the whip to cue your horse to step sideways - ‘tsk’ and reward.

Next hold the bit rings with both hands and turn your horses head to face down the track. When your horse relaxes into this position - ‘tsk’ and reward.

Now create a ‘mould’ with the bit, reins, your body and whip. Start with the sideways steps, then pull down on the ‘whip hand’ to create the bend.

Consistency is key. Your ‘mould’ should feel the same every time you ask your horse to shape their body into travers. Reward every few steps.

Build up steps gradually and repeat on both reins. Your ‘mould’ will soon feel comfortable for your horse and they will assume the shape willingly.
REMEMBER:
The number 1 criteria is relaxation. By training sympathetically for relaxation, your horse will be your willing partner. Everything follows from there.
The number 1 criteria is relaxation. By training sympathetically for relaxation, your horse will be your willing partner. Everything follows from there.
- Autumn
Winter Season
Finally, this is where it all comes together. In this season, we can see the 'piaffe' and 'spanish walk' taking shape. The feeling of taking your horse in your hands and 'dancing' is like 'magic'.
Winter: Lesson 1
Half Pass Trot
- Lateral trot movements
- Invisible box
- Shoulder in
- Renvers
- Go button
- Half pass
- Mirroring energy and posture
- Peripheral vision
- Consistency
Cancel your gym membership and dance with your horse instead!
In this lesson, Jenku is taking Jack in hand do lateral movements in trot. It’s such an amazing feeling when the horse and rider move as one. Ultimately it should look like a beautiful dance so Jack must be nice and light and responsive. Start by building in the go button. Once the trot is established and you can do a circle comfortably, you can take it further. Pick a line and go into half pass. The intention is not to get your horse to the other side, but to see if you can start with a few steps.
Be aware that the horse will mirror your energy and posture. When you want to transition upwards, breathe in and inflate your body, harden your gaze and raise your energy. Your horse will do the same. When you are finished, be sure to exhale, deflate and relax. Soften your gaze and open your peripheral vision. Jenku gives Jack a breather, which is as much a reward as the food is. Remember to always use consistent cues. You can’t vary your cues and expect your horse to understand what you’re asking for. Make sure your rein length is the same each time and that you rest your arm just behind his scapula in exactly the same way. Consistent input results in consistent output.
Winter: Lesson 2
Piaffe
- Swing
- Short-coupled
- Flexibility
- Piaffe
- Invisible box
- Rein back
- Shoulder in
- Renvers
- Travers
- Visual picture
- Cadence
- Rhythm
Finally the parts have all come together for Piaffe - pure magic!
Over the last couple of months, Jack has done lots of work in hand to improve his flexibility and now he’s ready to try the more advanced piaffe. There are a lot of pre-requisites to piaffe. To run through a few: Jack can stay in the invisible box, he can work straight and level, he can get his tail bone down and his legs under him. Rein back, shoulder in, renvers to travers are all exercises that Jack can tick off as accomplished. Now it’s time to start putting all the building blocks together.
Jenku uses the rein back to help Jack shift his weight and bring his hind legs under. Jenku is looking for a good squat before he asks Jack for the piaffe. If Jack is long in his body, then he’s not being set up for success. Pay attention to how you hold your whip. Its position will provide your horse with a clear visual picture of what you are asking of him. An open whip is for rein back, while a whip above his back allows you to tap for piaffe. If you want to develop more bounce and cadence, then move onto a circle. Start in shoulder in and then move to renvers so that your horse’s legs are stepping wide behind which increases flexibility. Click and reward as soon as he finds his rhythm. The feeling in Jenku’s hands is pure magic. Jack is light, up in his poll and moving rhythmically.
Winter: Lesson 3
Spanish Walk
- Spanish walk
- Mobilize shoulders
- Extended trot
- Flying changes
- Formula 1 steering wheel
- Limb co-ordination
- Subconscious brain
- Build myelin sheath
- Muscle memory
- Confidence
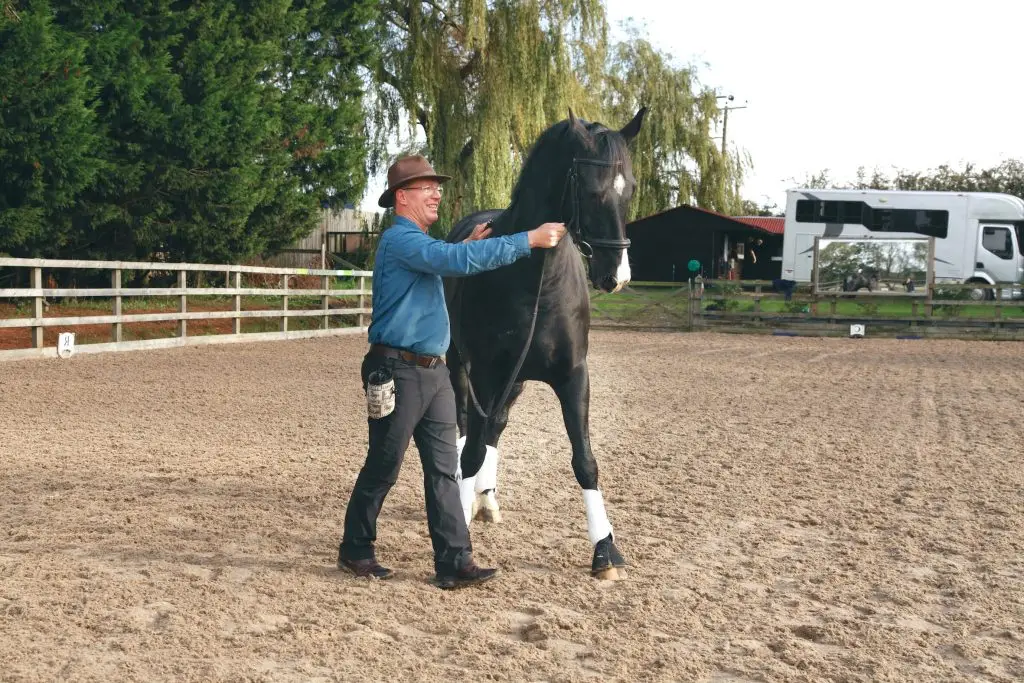
There's no Spanish Walk in dressage so why train it? This lesson explains why.
In this lesson, Jenku and Jack work on mastering the Spanish walk because it offers so many benefits. It helps mobilise the shoulders for extended trot, it develops the muscles in the chest, it’s good for flying changes and strengthens the horse’s back. What’s not to love? Earlier in the year, Jack and Jenku worked on the basics and in this film, they’re going to string all the pieces together. Your horse’s mouth is like a Formula 1 steering wheel. By now you’ve built lots of buttons into it. Now you need the co-ordination to get all the moving parts working at the right time.
Up till now, Jenku has been facing Jack’s back legs to help him with his limb co-ordination but, after some warm-up, he faces forward with a rein in each hand. To begin with, help him free up his front legs by shifting his weight from the left to right. Each time he does this, he fine tunes his co-ordination. After establishing the basics, Jenku and Jack work on the flow between each movement. Now all they need to do is put in the necessary repetitions to build myelin sheath and muscle memory. Tracy is blown away by how Jack’s confidence has grown as he becomes more co-ordinated and she can see how all the pieces have come together. Good man, Jack. You’re a machine!
Winter: Lesson 4
Developing Passage
- Spanish walk
- Piaffe
- Transitions
- Energy
- Cadence
- Passage
- Buttons
- Repetition
- Extension
- Confident rein
- Courtship behaviour
What do you get if you cross Piaffe with Spanish Walk? Bouncy Passage!
Can you rub your tummy, pat your head while singing a song and jumping up and down on one leg? Tricky isn’t it? In this lesson, Jenku does some serious multi-tasking and challenges Jack by mixing up Spanish walk and piaffe. Mixing up the two movements is important because the nice, bouncy steps come from the front legs as much as the hind legs. The idea is to alternate sitting, piaffe, then levelling out and coming up in the shoulders, spanish walk. In time and with repetition, not luck - the horse starts mixing up the front end and back end - and this is where the bouncy passage steps come from.
Start by checking in with the hind button as you’ve done in the previous films. When you’ve tuned into the back legs, now switch focus and work on the fronts. Can your horse lift alternate legs? Be sure that you wait for the extension and watch out for those front legs! You don’t want to be kicked inadvertently. Because bouncing between these two movements is complicated, keep your expectations realistic. Do a few strides and reward. Remember, piaffe is part of courtship behaviour. It comes from a place of joy. If you’re grinding away getting a headache, step your training back a notch. Enjoy your Christmas haynet Jack. You’ve earned it.
Downloadable Quick-Reference Cards
Winter: Lesson 1Half Pass Trot

Start in ‘shoulder in’ on a circle, in walk first, then progress to trot by building in the ‘go button’ - ‘cluck’ once, then tap with the whip at the girth area.

Your horse will mirror your energy and posture. When you want to transition upwards, breathe in, inflate your body, harden your gaze and raise your energy.

Build the trot up gradually - ‘tsk’ and reward just a few strides at first. Once the trot is established, the next step is to pull down on the whip hand into ‘renvers’.

Once you are in ‘renvers’ on the circle, pick a diagonal line heading towards a marker further down the arena. Travel down the line in ‘half pass’.

The intention is not to get your horse all the way to the marker, but to see if you can get just a few steps of half pass, with the ‘new’ outside leg crossing over.
REMEMBER:
Always use consistent cues. You can’t vary your cues and expect your horse to understand what you’re asking. Consistent input results in consistent output.
Always use consistent cues. You can’t vary your cues and expect your horse to understand what you’re asking. Consistent input results in consistent output.
- Winter